Who says being good means suffering at the altar of self denial? Spelt flatbreads topped with bright green loveliness are a great way to pack in the goodness when you've overdone things somewhat.
Last Saturday night I had a bit of a crazy one. I didn't intend for it to be quite so wild, but sometimes these nights take you by surprise don't they.
Don't get me wrong, I didn't expect not to drink a drop, and I suppose when seeing a very old friend who can really put it away that going overboard is a distinct possibility. But last Saturday night the-princess-of-darkness-Ciara-O'Reilly and I really went to town and drank six bottles of fizz.
Yes you read that correctly - six bottles. Between just the two of us. It's obscene. Especially considering we didn't have a scrap of food to eat either.
I had a really great night, the kind that makes me wistful about old times and longing to live closer to good friends. But Sunday came and went with me in bed feeling wretched, and by bank holiday Monday I still had an enormous hangover and struggled to do anything.
Needless to say food this week has been that of ease and virtue. Next time with Miss O'Reilly, I shall make sure to tread a more reasonable path to enjoyment.
The brief when considering what to make for supper this evening was to cram in as much greenery to feed my poor body and mind as possible, but often when forcing as much 'good' stuff inside me as I can leaves me feeling a bit bored and uninspired. Not today - this green spelt 'pizza' is a seriously tasty way of being good.
For two, and with two flatbreads left for something else:
A couple of handfuls of rocket
2 spring onions, finely chopped
1 small red onion, shaved very finely on the mandolin
1 fennel bulb, shaved very finely on the mandolin
A couple of tablespoons walnuts, lightly crushed
Around 70g crumbled Roquefort
The juice of one juicy lemon
1 ripe avocado
100g shelled broad beans (easiest done after boiling briefly and then cooling in cold water)
2 tablespoons natural yogurt
A handful of fresh mint
Good quality extra virgin olive oil
A heaped teaspoon black onion seeds
Sea salt and black pepper
340g white spelt flour
1 teaspoon yeast granules
1 teaspoon honey
1 cup of warm water
Method:
Start with making the dough - which is rather soft and wibbly before cooking so needs lots of extra flour on your work top to stop it from sticking - Add 2 scrunches of salt, honey and the yeast to the cup of warm water and leave for 10 minutes
- In a mixing bowl place the flour and onion seeds, make a hole in the centre of the dough (reserving a bit for kneading) and pour the water in, then using your hands mix it all together until you've formed a ball of dough
- Turn it out onto a lightly floured surface and knead gently for a couple of minutes, then place it into a floured bowl and cover with cling film for an hour
- Take the dough out of the bowl and turn it out onto a floured surface, cut into quarters and roll each out each in turn into as round a shape as you can make
- Lay them one at a time on a lightly oiled baking sheet on a baking tray and bake for 11 minutes until you've baked all four. Remove them from the oven and turn the oven off
- Pile them up separated by baking paper, this will stop them cooling down and getting stuck to each other, and will keep them just crisp enough
- In a food processor combine the broad beans, avocado, yogurt, mint, a scrunch of sea salt and a generous glug of extra virgin olive oil, and blitz until its formed a smooth paste
- Into a mixing bowl combine the razor thin red onion, spring onion, razor thin fennel, lemon juice and a scrunch of sea salt and mix together with your fingers, then add the rocket and combine gently again - you want to keep the rocket from going soggy
- Use half the avocado mixture on each of the 2 flatbreads and smear it over the breads like you would a tomato sauce on a pizza
- Cut the breads up on a chopping board and move them to a plate (I find it easier to cut them up before piling everything on them)
- Now pile up the fennel and rocket mixture onto each of the slices
- Top with the crushed walnuts and dots of the Roquefort cheese, then eat
Saturday, 7 May 2011
Vietnamese style summer rolls with rare sesame tuna and fresh herbs
These rolls are packed with freshness and flavour, making a perfect light lunchtime dish when the weather's warm and humid.
Along with the juicy tuna steak I filled the rolls with crisp cucumber shards, spring onion, rice noodles, corriander, mint and basil. Use Thai holy basil if you can find it but I'm really struggling to, so am growing my own instead.
You can make them with all sorts of fillings so long as you cram in the herbs - that's the key to them being so fragrant, then use the dipping sauces to get in some chilli zing and tart sweetness to excite your tastebuds even more.
For two:
One tuna steak
A tablespoon each of black and white sesame seeds
A teaspoon sea salt
Oil for frying
8 rice paper roll sheets - get them from an Asian supermarket or order them online easily enough
Skinny rice noodles made up as per the pack instructions, then cooled under cold water and drained - I used one large sheet of rice noodles
A teaspoon toasted sesame oil
Quarter of a large cucumber, cored and cut into fine strips
2 spring onions, top and tailed, cut in half and finely shredded
Half a red onion, peeled, halved and very finely sliced
A handful of fresh mint, finely chopped
A handful of fresh basil
A handful of fresh corriander - roots chopped finely, leaves left whole
Juice of half a juicy lemon
A tablespoon fish sauce
Two heaped teaspoons grated palm sugar
Sweet chilli sauce (bought, I don't make my own or at least not for this)
Method:
- To give your dressing time to steep make that first, simply combine the lemon juice, palm sugar and fish sauce in a pot and stir, then set aside
- Turn your oven on to 50 degrees and lay your cold rice noodles out onto a baking sheet, bake in the oven for around 20 minutes - this is only to dry them out so the rolls don't get soggy, not to cook them. Turn them over once whilst drying
- Onto a small plate sprinkle out your sesame seeds and salt, and lay the tuna steak onto the plate, turn it over on both sides and all edges until its covered in the seeds and salt
- Heat a frying pan on a high heat, add a drop of oil to the pan and wait for it to get hot. Take your tuna steak and place it into the hot pan - cook for a minute on each side and then the edges (longer if the steak is thicker - just remember you want it to be rare inside)
- Remove the tuna from the pan and set on a chopping board, slice into strips then break those strips into the flakes, set aside
- In a bowl combine the herbs, spring onions, red onion, cucumber and sesame oil and toss together with your hands, now add the tuna to the mixture and combine gently
- Take the noodles out of the oven
- Fill a large bowl with water that's a hot as your hands can stand, place a plate in front of you to work on
- Take one of the rice paper sheets and submerge it in the water for around 20 seconds, or until it has just turned soft, remove it carefully so it doesn't tear and lay it out on the plate in front of you, smoothing out any bubbles or folds
- Lay some rice noodles down first, horizontally and closer to you than the centre of the sheet - a small bunch, and then on top lay the herb and tuna mixture
- Bring the sides in on the rolls as in the picture and then fold the bottom edge that's closet to you up and over - attaching to the brought in edges. Now as you would with a spring roll, tuck the ingredients down into the envelope you've created, and begin folding it over into a roll, roll it over and over until its totally closed, sealed and you have your summer roll ready. Repeat with the other sheets until all the mixture is used up
- Decant the sweet chilli sauce into a pot or glass, and do the same with the fish sauce and palm sugar dressing into another glass
- Plate the rolls together (for prettiness!), dress with a few more fresh herbs and serve with the dipping sauces
Along with the juicy tuna steak I filled the rolls with crisp cucumber shards, spring onion, rice noodles, corriander, mint and basil. Use Thai holy basil if you can find it but I'm really struggling to, so am growing my own instead.
You can make them with all sorts of fillings so long as you cram in the herbs - that's the key to them being so fragrant, then use the dipping sauces to get in some chilli zing and tart sweetness to excite your tastebuds even more.
For two:
One tuna steak
A tablespoon each of black and white sesame seeds
A teaspoon sea salt
Oil for frying
8 rice paper roll sheets - get them from an Asian supermarket or order them online easily enough
Skinny rice noodles made up as per the pack instructions, then cooled under cold water and drained - I used one large sheet of rice noodles
A teaspoon toasted sesame oil
Quarter of a large cucumber, cored and cut into fine strips
2 spring onions, top and tailed, cut in half and finely shredded
Half a red onion, peeled, halved and very finely sliced
A handful of fresh mint, finely chopped
A handful of fresh basil
A handful of fresh corriander - roots chopped finely, leaves left whole
Juice of half a juicy lemon
A tablespoon fish sauce
Two heaped teaspoons grated palm sugar
Sweet chilli sauce (bought, I don't make my own or at least not for this)
Method:
- To give your dressing time to steep make that first, simply combine the lemon juice, palm sugar and fish sauce in a pot and stir, then set aside
- Turn your oven on to 50 degrees and lay your cold rice noodles out onto a baking sheet, bake in the oven for around 20 minutes - this is only to dry them out so the rolls don't get soggy, not to cook them. Turn them over once whilst drying
- Onto a small plate sprinkle out your sesame seeds and salt, and lay the tuna steak onto the plate, turn it over on both sides and all edges until its covered in the seeds and salt
- Heat a frying pan on a high heat, add a drop of oil to the pan and wait for it to get hot. Take your tuna steak and place it into the hot pan - cook for a minute on each side and then the edges (longer if the steak is thicker - just remember you want it to be rare inside)
- Remove the tuna from the pan and set on a chopping board, slice into strips then break those strips into the flakes, set aside
- In a bowl combine the herbs, spring onions, red onion, cucumber and sesame oil and toss together with your hands, now add the tuna to the mixture and combine gently
- Take the noodles out of the oven
- Fill a large bowl with water that's a hot as your hands can stand, place a plate in front of you to work on
- Take one of the rice paper sheets and submerge it in the water for around 20 seconds, or until it has just turned soft, remove it carefully so it doesn't tear and lay it out on the plate in front of you, smoothing out any bubbles or folds
- Lay some rice noodles down first, horizontally and closer to you than the centre of the sheet - a small bunch, and then on top lay the herb and tuna mixture
- Bring the sides in on the rolls as in the picture and then fold the bottom edge that's closet to you up and over - attaching to the brought in edges. Now as you would with a spring roll, tuck the ingredients down into the envelope you've created, and begin folding it over into a roll, roll it over and over until its totally closed, sealed and you have your summer roll ready. Repeat with the other sheets until all the mixture is used up
- Decant the sweet chilli sauce into a pot or glass, and do the same with the fish sauce and palm sugar dressing into another glass
- Plate the rolls together (for prettiness!), dress with a few more fresh herbs and serve with the dipping sauces
Tuesday, 19 April 2011
Rose veal ragu tortelloni with toasted walnut and rocket pesto
Veal is a newly discovered meat for me. The stories of veal calves being treated terribly put me off a long time, but then I picked up on the rose veal movement and suddenly I could buy it and feel good about it.
I tweeted the foodie community about where to get hold of some and Heaves Farm Veal messaged me, their Cumbrian product looked perfect and I placed an online order with one of their stockists, Alternative Meats.
My order included shanks for making osso bucco, casseroling steak, escalopes for wiener schnitzel, bones for making stock and some minced veal.
This haul is stashed in the freezer at the minute, the osso bucco has a particular dinner party night and two guests names on it, the wiener schnitzel is for Mathew and I to bring back memories of Vienna, and the braising cut is begging to be turned into a goulash with dumplings - but given the weather hotting up somewhat unexpectedly this might well have to wait.
The veal mince is very good indeed. Its taste is sweet and delicate and the meat tender and juicy - lending itself perfectly to a ragu. I decided to strike out and make my first tortellonis with this dish, and I have been delighted with the results - the tortellonis are very easy to make once you get the hang of them.
Given the clement weather the sweet ragu needed a light dressing to go with it, so I decided to make a slightly different kind of pesto. This one majors on rocket and toasted walnuts and it produces a very nutty and delicious result.
Ingredients:
This will make enough tortelloni's for 2 people to eat over 2 nights. The pesto batch will last a while as you'll only need a bit of it for this dish - just make sure it's covered in extra virgin in the fridge so it doesn't perish - same for the sundried tomatoes.
500g veal mince
400mls pasatta
1 golden onion finely chopped
1 tablespoon sugar
One clove of garlic, minced
One glass of white wine
10ish cherry tomatoes, halved
Extra virgin olive oil
2 bags rocket
A big handful fresh basil leaves
40g grated Parmesan
50g walnuts, lightly toasted in a dry frying pan
A tablespoon pine nuts, lightly toasted in a dry frying pan
250 grams type 00 flour
3 eggs
Sea salt and black pepper
Method:
Start with this very simple ragu, and make sure its cold before you make the tortellonis - the next day is best as it gives the flavours enough time to deepen
- In a deep saucepan or sautee pan, fry the onion in some butter and olive oil until translucent and turning gently golden, then add the veal mince and fry on a medium to high heat, you want to leave it as long as you can before turning it so that it gets nice and golden on its edges
- After around 10 minutes of cooking add the garlic clove and cook for a minute or two, then before it catches add the wine and pasatta, the sugar and a generous scrunch of salt, and turn onto a very low heat and let it blip and reduce for an hour or two
- Once its ready let it cool, preferably overnight.
Now on to the pesto and sundried tomatoes
- Preheat your oven to 100 degrees and lay your cut tomatoes cut side up onto a baking sheet, then bake for 2 hours
- Whilst baking pour some olive oil (as much as you think will cover the tomatoes) into a clean jar and add about a quarter of a clove of finely minced garlic, mix together and let it steep until the tomatoes are done
- Once done remove them from the oven and pop straight into the jar, give a generous scrunch of salt and some black pepper and mix carefully so the garlic oil covers all the tomatoes - because they're warm they'll start to absorb the oil and be even more juicy and tasty
- Place the rocket, basil, pine nuts, garlic, Parmesan and walnuts into food processor and blitz until it's all finely chopped, keeping the food processor on drizzle in olive oil until it forms a paste, then decant into a clean jar and top with more olive oil until its totally covered. You can put it straight into the fridge now but you'll need it to have been out for an hour before using it for this dish as otherwise the oil will be too set
Onto the tortelloni's
- In a food processor place your eggs, flour, a tablespoon of extra virgin and a generous scrunch of salt and blitz until the dough comes together
- Turn it out onto a lightly floured surface and knead with some more flour for just a minute or two until its no longer sticky and is springing back nicely, then place in a floured bowl and cover with cling film for 15 minutes
- Break the dough into quarters and put a quarter through the pasta machine at a time. Mine has 7 thickness settings and I find these stuffed pastas work best at setting 6. 7 is great but its just too fine and if they get any holes in they just explode in the water - 6 is easier to work with and still feels and tastes great
- Roll your pasta out and lightly dust it before putting it back through the next setting to stop it dragging through, then lay the long sheet in front of you
- Using a sharp knife trim the ragged top and bottom edges off, then cut the pasta into large squares
- Turn the square diagonally towards you, so its like a diamond, dot a teaspoon of the veal mince into the middle of the pasta and then using a pastry brush, brush water around the edges of it and fold it over so the top and bottom edges meet as in my pic, so you now have a triangle in front of you with the flat long edge facing you
Here comes the slightly tricky bit but you'll soon get the hang of it, have a look at the pictures above as I find they are easier to understand the movement than a written description. If you're still struggling then google it and look at lots of different pictures, and failing that you could make simple ravioli instead
- Place your thumbs on the bottom long edge and bring your fingers down around the sides so that the long edges hook round, as in my picture, now fold these edges around your finger a bit like a ring, and carefully brush a bit of water on the edge that will go on the underneath, then stick the edges together
- Place the tortelloni in a floured plate and repeat until you've used all the mixture or as much as you want
- When you're ready to eat bring a pan of salted water to a rolling boil and drop them all in and put the lid back on
- When they all start bobbing to the surface (1-2 minutes and no more) they're done, carefully drain them and then leave them in the colander in the top of your pan
- I plate them by picking them out with two spoons and arranging them on the plate nicely fanned out with their points facing the plate edge (this is of course optional and in no way alters the taste!) once they're on the plates, stir your pesto and start dotting it over them and the plate, then dot on some of your sundried tomatoes, a light grating of Parmesan, a scattering of the crushed walnuts and drizzle of extra virgin
- Eat
I tweeted the foodie community about where to get hold of some and Heaves Farm Veal messaged me, their Cumbrian product looked perfect and I placed an online order with one of their stockists, Alternative Meats.
My order included shanks for making osso bucco, casseroling steak, escalopes for wiener schnitzel, bones for making stock and some minced veal.
This haul is stashed in the freezer at the minute, the osso bucco has a particular dinner party night and two guests names on it, the wiener schnitzel is for Mathew and I to bring back memories of Vienna, and the braising cut is begging to be turned into a goulash with dumplings - but given the weather hotting up somewhat unexpectedly this might well have to wait.
The veal mince is very good indeed. Its taste is sweet and delicate and the meat tender and juicy - lending itself perfectly to a ragu. I decided to strike out and make my first tortellonis with this dish, and I have been delighted with the results - the tortellonis are very easy to make once you get the hang of them.
Given the clement weather the sweet ragu needed a light dressing to go with it, so I decided to make a slightly different kind of pesto. This one majors on rocket and toasted walnuts and it produces a very nutty and delicious result.
Ingredients:
This will make enough tortelloni's for 2 people to eat over 2 nights. The pesto batch will last a while as you'll only need a bit of it for this dish - just make sure it's covered in extra virgin in the fridge so it doesn't perish - same for the sundried tomatoes.
500g veal mince
400mls pasatta
1 golden onion finely chopped
1 tablespoon sugar
One clove of garlic, minced
One glass of white wine
10ish cherry tomatoes, halved
Extra virgin olive oil
2 bags rocket
A big handful fresh basil leaves
40g grated Parmesan
50g walnuts, lightly toasted in a dry frying pan
A tablespoon pine nuts, lightly toasted in a dry frying pan
250 grams type 00 flour
3 eggs
Sea salt and black pepper
Method:
Start with this very simple ragu, and make sure its cold before you make the tortellonis - the next day is best as it gives the flavours enough time to deepen
- In a deep saucepan or sautee pan, fry the onion in some butter and olive oil until translucent and turning gently golden, then add the veal mince and fry on a medium to high heat, you want to leave it as long as you can before turning it so that it gets nice and golden on its edges
- After around 10 minutes of cooking add the garlic clove and cook for a minute or two, then before it catches add the wine and pasatta, the sugar and a generous scrunch of salt, and turn onto a very low heat and let it blip and reduce for an hour or two
- Once its ready let it cool, preferably overnight.
Now on to the pesto and sundried tomatoes
- Preheat your oven to 100 degrees and lay your cut tomatoes cut side up onto a baking sheet, then bake for 2 hours
- Whilst baking pour some olive oil (as much as you think will cover the tomatoes) into a clean jar and add about a quarter of a clove of finely minced garlic, mix together and let it steep until the tomatoes are done
- Once done remove them from the oven and pop straight into the jar, give a generous scrunch of salt and some black pepper and mix carefully so the garlic oil covers all the tomatoes - because they're warm they'll start to absorb the oil and be even more juicy and tasty
- Place the rocket, basil, pine nuts, garlic, Parmesan and walnuts into food processor and blitz until it's all finely chopped, keeping the food processor on drizzle in olive oil until it forms a paste, then decant into a clean jar and top with more olive oil until its totally covered. You can put it straight into the fridge now but you'll need it to have been out for an hour before using it for this dish as otherwise the oil will be too set
Onto the tortelloni's
- In a food processor place your eggs, flour, a tablespoon of extra virgin and a generous scrunch of salt and blitz until the dough comes together
- Turn it out onto a lightly floured surface and knead with some more flour for just a minute or two until its no longer sticky and is springing back nicely, then place in a floured bowl and cover with cling film for 15 minutes
- Break the dough into quarters and put a quarter through the pasta machine at a time. Mine has 7 thickness settings and I find these stuffed pastas work best at setting 6. 7 is great but its just too fine and if they get any holes in they just explode in the water - 6 is easier to work with and still feels and tastes great
- Roll your pasta out and lightly dust it before putting it back through the next setting to stop it dragging through, then lay the long sheet in front of you
- Using a sharp knife trim the ragged top and bottom edges off, then cut the pasta into large squares
- Turn the square diagonally towards you, so its like a diamond, dot a teaspoon of the veal mince into the middle of the pasta and then using a pastry brush, brush water around the edges of it and fold it over so the top and bottom edges meet as in my pic, so you now have a triangle in front of you with the flat long edge facing you
Here comes the slightly tricky bit but you'll soon get the hang of it, have a look at the pictures above as I find they are easier to understand the movement than a written description. If you're still struggling then google it and look at lots of different pictures, and failing that you could make simple ravioli instead
- Place your thumbs on the bottom long edge and bring your fingers down around the sides so that the long edges hook round, as in my picture, now fold these edges around your finger a bit like a ring, and carefully brush a bit of water on the edge that will go on the underneath, then stick the edges together
- Place the tortelloni in a floured plate and repeat until you've used all the mixture or as much as you want
- When you're ready to eat bring a pan of salted water to a rolling boil and drop them all in and put the lid back on
- When they all start bobbing to the surface (1-2 minutes and no more) they're done, carefully drain them and then leave them in the colander in the top of your pan
- I plate them by picking them out with two spoons and arranging them on the plate nicely fanned out with their points facing the plate edge (this is of course optional and in no way alters the taste!) once they're on the plates, stir your pesto and start dotting it over them and the plate, then dot on some of your sundried tomatoes, a light grating of Parmesan, a scattering of the crushed walnuts and drizzle of extra virgin
- Eat
Tuesday, 12 April 2011
Spelt flatbreads with haloumi, capers and homemade sundried tomatos
Ok so they're not sun-dried, that'd be difficult seeing as we've only had a week of sun. And actually I don't have the patience to wait weeks for them to slowly bake anyway. Instead, these flavour packed and intensely sweet tasting beauties are done in the oven, and they're really easy to do.
I've made these purely after eating the delicious ones at Flatplanet in London on Monday. The bread not only has a wonderfully nutty taste and crispy but soft centred texture, it's widely eaten by people who struggle with wheat - ticks all my boxes.
Instead of doing a traditional tomato sauce for the base I've used a red pepper dip I've recently got into. It's full of flavour and is a bit different, and it works very well in complementing the flavour of the capers and haloumi, tasty tasty.
Think of this simple dish as a cross between an open sandwich and a pizza - loads of options for interesting toppings and making the dough is incredibly easy (trust me, I don't do baking and this recipe is foolproof).
For 4 flatbreads, and toppings for just 2:
340g wholegrain spelt flour
1 cup of warm water
1 teaspoon yeast granules
1 tablespoon runny honey
2 red peppers cut into strips
3 tablespoons natural yogurt
6 tomatoes, quartered
Half a clove of garlic, finely minced
One avocado, sliced finely
A tablespoon of drained capers
A handful of fresh rocket
8 slices of haloumi
Sea salt and pepper
Extra virgin olive oil - the best you can get hold of
Groundnut / sunflower oil
Method:
Start with making the sundried tomatoes
- Preheat the oven to 100 degrees and lay the quartered tomatoes onto a non stick baking sheet and bake for 2 hours
- Remove and place them into a bowl and dot with the minced garlic, a generous scrunch of salt and grind of pepper, and then drizzle them in extra virgin olive oil - enough to cover them. Set aside
Now it's time to make the dough
- Add 2 scrunches of salt, honey and the yeast to the cup of warm water and leave for 10 minutes
- Make a hole in the centre of the dough (reserving a bit for kneading) and pour the water in, then using your hands mix it all together until you've formed a ball of dough
- Turn it out onto a lightly floured surface and knead gently for a couple of minutes, then place it into a floured bowl and cover with cling film for an hour
- Preheat your oven to 200degrees and place the red pepper slices and a dressing of olive oil into a roasting tin, and roast for 4o minutes until they've softened and begun to char around the edges
- Remove from the oven and pop into a blender and blitz with a little salt. When they've cooled in the food processor after about 10 minutes add the yogurt and blitz again, decant into a bowl and set aside
- Take the dough out of the bowl and turn it out onto a floured surface, cut into quarters and roll each out each in turn into whatever shape it comes out in until they're around 5mm thick - I like them not being uniform and being a bit random, adds to their character!
- Lay 2 of them side by side onto a lightly oiled baking sheet on a baking tray and bake for 10 minutes. Remove from the oven and bake the remaining 2. Remove them from the oven and turn the oven off
- Pile them up separated by baking paper, this will stop them cooling down and getting stuck to each other, and will keep them just crisp enough
- Heat some frying oil in a frying pan on a medium high heat and fry your haloumi slices on each side for around 2-3 minutes until its nice and golden, then remove it from the pan
- Turn on the grill
- Take both of the flatbreads you'll be using and place them onto a clean surface, dollop half the red pepper sauce onto each and using the back of a spoon smear it over as you would a tomato sauce on a pizza base
- Now place on the flatbreads the capers and haloumi, and grill both of them for a few minutes
- Remove and dot on the tomatoes, avocado and drizzle over more of the extra virgin olive oil from the tomatoes over the breads, then top with some rocket and cut into large pieces
- Eat
I've made these purely after eating the delicious ones at Flatplanet in London on Monday. The bread not only has a wonderfully nutty taste and crispy but soft centred texture, it's widely eaten by people who struggle with wheat - ticks all my boxes.
Instead of doing a traditional tomato sauce for the base I've used a red pepper dip I've recently got into. It's full of flavour and is a bit different, and it works very well in complementing the flavour of the capers and haloumi, tasty tasty.
Think of this simple dish as a cross between an open sandwich and a pizza - loads of options for interesting toppings and making the dough is incredibly easy (trust me, I don't do baking and this recipe is foolproof).
For 4 flatbreads, and toppings for just 2:
340g wholegrain spelt flour
1 cup of warm water
1 teaspoon yeast granules
1 tablespoon runny honey
2 red peppers cut into strips
3 tablespoons natural yogurt
6 tomatoes, quartered
Half a clove of garlic, finely minced
One avocado, sliced finely
A tablespoon of drained capers
A handful of fresh rocket
8 slices of haloumi
Sea salt and pepper
Extra virgin olive oil - the best you can get hold of
Groundnut / sunflower oil
Method:
Start with making the sundried tomatoes
- Preheat the oven to 100 degrees and lay the quartered tomatoes onto a non stick baking sheet and bake for 2 hours
- Remove and place them into a bowl and dot with the minced garlic, a generous scrunch of salt and grind of pepper, and then drizzle them in extra virgin olive oil - enough to cover them. Set aside
Now it's time to make the dough
- Add 2 scrunches of salt, honey and the yeast to the cup of warm water and leave for 10 minutes
- Make a hole in the centre of the dough (reserving a bit for kneading) and pour the water in, then using your hands mix it all together until you've formed a ball of dough
- Turn it out onto a lightly floured surface and knead gently for a couple of minutes, then place it into a floured bowl and cover with cling film for an hour
- Preheat your oven to 200degrees and place the red pepper slices and a dressing of olive oil into a roasting tin, and roast for 4o minutes until they've softened and begun to char around the edges
- Remove from the oven and pop into a blender and blitz with a little salt. When they've cooled in the food processor after about 10 minutes add the yogurt and blitz again, decant into a bowl and set aside
- Take the dough out of the bowl and turn it out onto a floured surface, cut into quarters and roll each out each in turn into whatever shape it comes out in until they're around 5mm thick - I like them not being uniform and being a bit random, adds to their character!
- Lay 2 of them side by side onto a lightly oiled baking sheet on a baking tray and bake for 10 minutes. Remove from the oven and bake the remaining 2. Remove them from the oven and turn the oven off
- Pile them up separated by baking paper, this will stop them cooling down and getting stuck to each other, and will keep them just crisp enough
- Heat some frying oil in a frying pan on a medium high heat and fry your haloumi slices on each side for around 2-3 minutes until its nice and golden, then remove it from the pan
- Turn on the grill
- Take both of the flatbreads you'll be using and place them onto a clean surface, dollop half the red pepper sauce onto each and using the back of a spoon smear it over as you would a tomato sauce on a pizza base
- Now place on the flatbreads the capers and haloumi, and grill both of them for a few minutes
- Remove and dot on the tomatoes, avocado and drizzle over more of the extra virgin olive oil from the tomatoes over the breads, then top with some rocket and cut into large pieces
- Eat
Monday, 11 April 2011
Liberty launch and crab cakes with red pepper dip and avocado salsa
Today we visited Liberty. Not for shopping (well, not specifically for shopping, though of course some was done whilst there) but for a personal project that we've been working on with them.
Without boring you with the intricate details we've sold in a range of original Parisian artworks, beautiful creations that were hand made to brief for some of the worlds most known and loved fashion designers between the 20's and the 90's. Pretty exciting stuff really.
My parents are in possession of nearly 500 of them and we've already sold 60 ahead of the opening date. Without being all Hannah-the-Planner about it buying one is chance to own an original piece of creative Parisian history, one that unites art, design and fashion. Ok, pitch over.
Well nearly - here's the link to our site should you like to download the full collection (prices available on request) www.theLDcollection.co.uk or if you fancy a look at them in the flesh, they're currently residing on the 4th floor at Liberty, looking rather splendid.
As well as installing the artworks out of hours (it felt a thrillingly eerie being alone in the closed store) we did a little bit of eating too.
Plum Valley. Good friends of mine wont find this a surprise, I hold them in very high regard and think they're the best dim sum Ive ever had in London (even though I am unable to eat chillies at the moment). On this lively Sunday night in Chinatown we squeezed into a dark booth and ate our way around the dim sum menu, all were a delight but the black cod and ginger was the star of the show.
Right next door to Liberty is a great place called Flatplanet. They serve spelt flat breads with a variety of organic toppings and were the perfect way to begin Monday with their breakfast creation, along with some great coffee inside their quirky, cool little cafe. If I lived locally I think I'd be in there daily.
After some shopping in Liberty followed by hanging out in the sunshine and having some cocktails we strolled over to Pho, the restaurant dedicated to (and named after) Vietnam's most well known street food. There we shared a large bowl of the beautiful rich but light beef stock with rice noodles, steak, mint, holy basil and coriander. The liquor was incredible (if they bottled it I'd buy it) and I have returned with new insight into the dish - expect a recipe very shortly.
I sat on the train on the way home making notes about new dishes I wanted to create, combinations of flavours to try based on what I'd seen this last 24 hours. Such sessions usually make me impatient as I want to eat the new ideas there and then, but tonight on the way home this feeling escaped me - for we had sat patiently waiting for us in the fridge some little crab cakes I'd made on Sunday morning ready for our return.
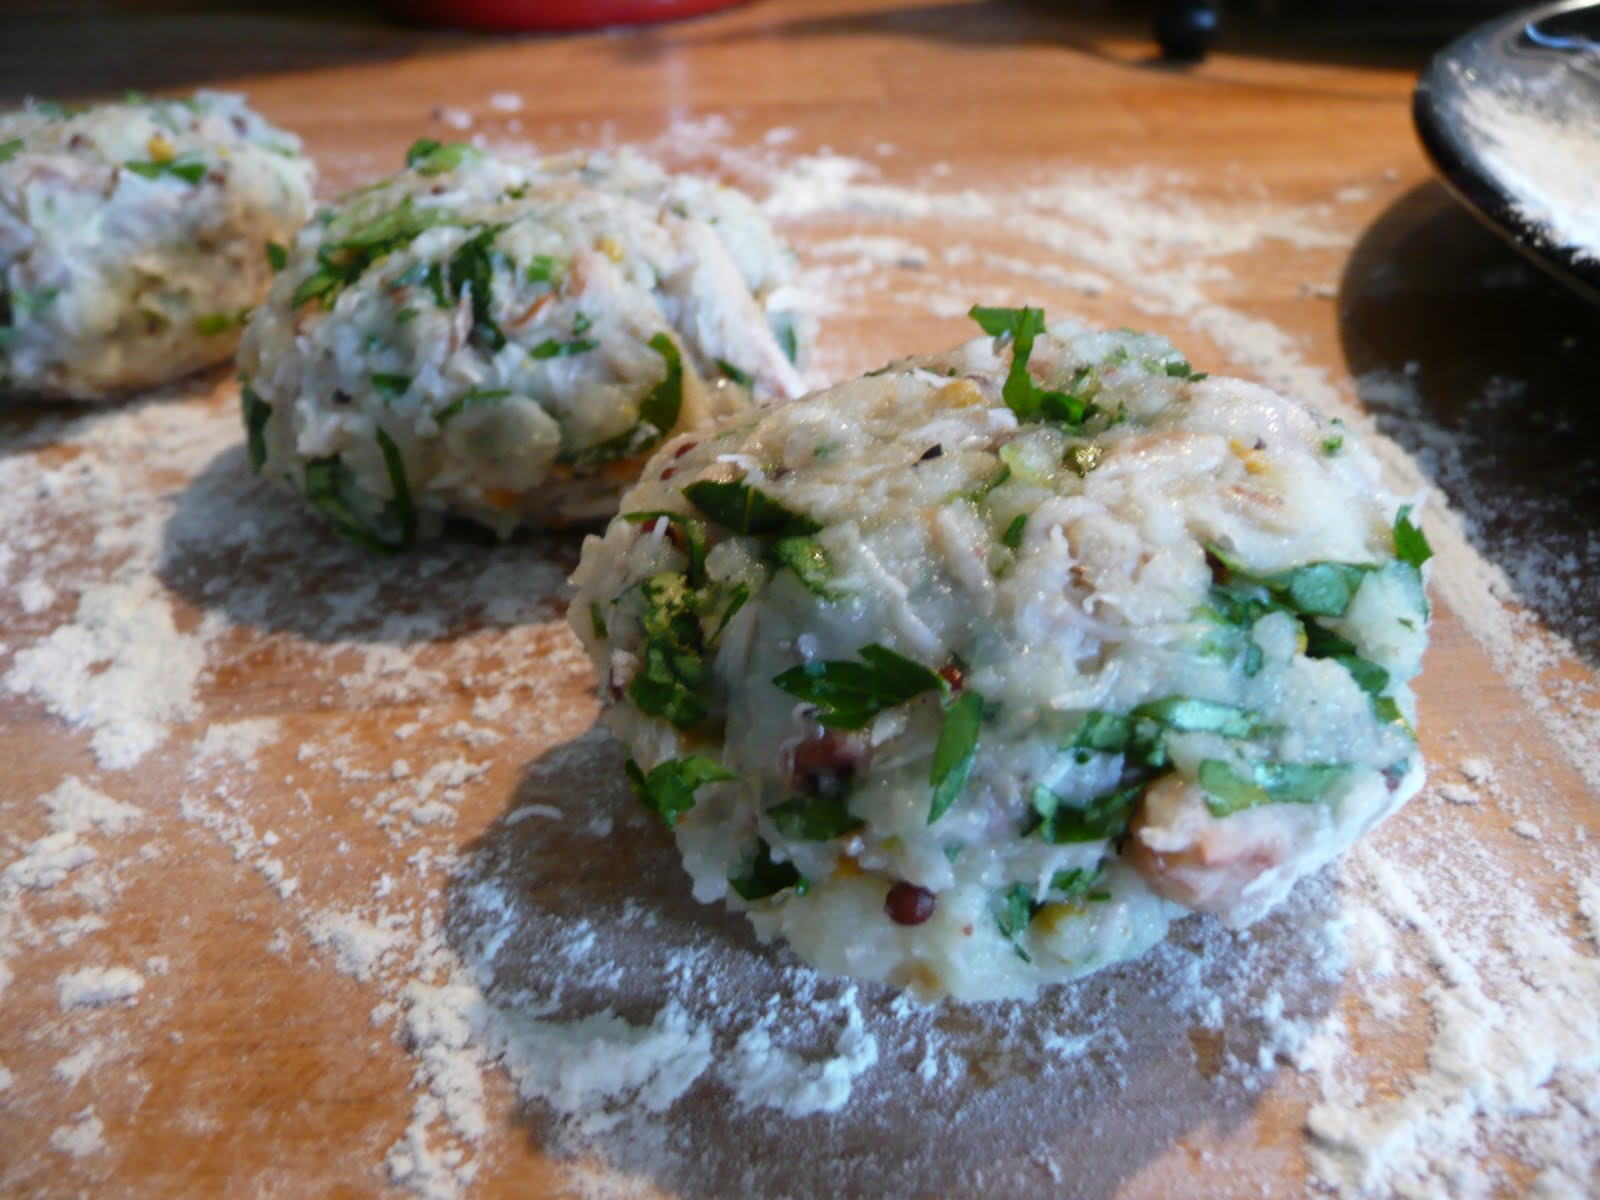
The secret with cooking these and achieving a light but crisp outer is to chill them enough to really firm them up - so a couple of hours is ideal but if you can make them the day before (good for forward planning and preparing) they'll be perfect.
For 9 cakes and food for 3:
Two baking potatoes, baked and cooled
3 slices white bread, crusts removed and left to go stale before blitzing into crumbs
300g white crab meat
10 large king prawns, pulsed in a food processor briefly
1 spring onion
A handful of fresh basil leaves, rolled up and finely sliced
1 heaped teaspoon wholegrain mustard
Juice of half a lemon
A generous handful of fresh parsley finely cut
Three red peppers, cut into broad strips
3 tablespoons natural yogurt
Extra virgin olive oil
Sea salt and black pepper
1 avocado, diced
5 medium sized tomatoes, diced
Half a clove of garlic, finely diced
3 tablespoons rice vinegar
Plain flour for dusting
Unsalted butter and groundnut/sunflower oil for frying
Method:
- Cut the peppers into strips, dress with some olive oil and roast until they begin to char at the edges in an oven at 180 degrees. Once done remove and leave to cool
- Place 2/3 of the peppers into a food processor and blitz, adding the yogurt and some salt and pepper, then decant into a bowl ready for later. Reserve the remaining third of the strips for once the dish is done.
- In a separate bowl combine the chopped tomatoes, avocado, garlic, rice vinegar, a slug of extra virgin olive oil and some salt and pepper, mix together and set aside
- In a mixing bowl combine the crab, mustard, parsley, lemon juice, spring onion, king prawns, bread crumbs, mashed potato and salt and pepper and mix together with a fork until all the ingredients are combined but still separate. Using your hands bring the mix together into the crab cakes. Set aside on a plate and chill them for at least 2 hours, or up to 24.
- When you're ready to cook them remove from the fridge and lightly dust all over with plain flour
- Heat a frying pan on a medium heat with a knob of butter and frying oil, and once it starts to foam place the fishcakes into the pan. Fry on each side for 4-5 minutes then they'll be ready
- Plate the cakes, dot the red pepper dip around the plate and then follow that with the avocado salsa, then place the remaining sliced and roasted red peppers on the top of the cakes and finally the shredded basil leaves
Thursday, 7 April 2011
Polenta dusted sweet potato gnocchi with tomato salsa
I'll be honest with you, these aren't as easy to make as ordinary potato gnocchi. They're rather sticky so you can't roll them out as easily or neatly, or cut them into cute little pillows, and whilst cooking I thought they'd all joined together in the pan as a single orange mass. I'm perhaps not selling them as I should, but trust me - kitchen alchemy will occur and they're well worth the work.
I served them with a light and easy tomato salsa, a scattering of Parmesan and a simple baked salmon fillet encrusted with crushed crisp pancetta and fennel seeds (mega easy, simply crush together in a pestle and mortar and press onto the side of a skinless salmon fillet and bake for 7 minutes exactly at 190 degrees).
For two:
400g sweet potato, roasted until cooked, then cooled, peeled and mashed
160g plain flour
A few gratings of nutmeg
25g grated Parmesan and more Parmesan for dusting
Sea salt and black pepper
A few pinches of ground nutmeg
A few handfuls polenta
3 or 4 juicy tomatoes, diced finely
One spring onion, top and tailed and finely cut
A teaspoon rice vinegar
A few glugs of extra virgin olive oil
Half a clove of garlic, finely chopped
Method:
- In a bowl combine the chopped tomatoes, spring onion, olive oil, vinegar, a scrunch of salt and pepper and the garlic and set aside
- In a large mixing bowl place the mashed sweet potato, then give a scrunch of salt and pepper and the nutmeg
- Bring a deep pan of salted water to the boil ready for when the gnocchis are all made, once boiling put the lid on and turn it down
- Use a fork to combine the mixture, gradually add the flour and Parmesan to the potato until its all combined - you might want to use a hand part way through to get this all done. Don't be scared that its a bit sticky, it'll all come good
- Lightly dust a clean work surface with a mixture of plain flour and the polenta, then turn out the ball of gnocchi and lightly and briefly knead it in the flour and polenta until its a little less sticky
- Break it into 2 pieces and then gently roll each out in turn until they're like flattish sausages, then cut them into roughly 1cm wide pieces
- Once all of them have been cut as in the picture above, lightly sprinkle over some more polenta to cover their cut edges
- Now sweep them off the work surface (as if you were sweeping crumbs away) and onto a plate - this is the easiest way to get them into the pan to cook
- When you're ready to cook them, make sure the pan of water is a rolling boil, then pour them all into the pan off the plate and put the lid back on
- They'll take a couple of minutes to cook and you need to just stir them once. They'll be ready once they start bobbing up to the top
- Drain them once ready then pour them back into the pan, give them a scrunch of salt and pepper, a glug of olive oil and a grating of Parmesan. Plate the gnocchis and drizzle the tomato salsa over the top, then devour
Wednesday, 6 April 2011
Roasted red pepper houmous - ready in less than ten minutes
We don't really keep 'snacky' things in the house. I guess it's to do with the way I was raised - convenience and junk food at home were entirely foreign, the only way they entered was if you snuck them in.
Instead, we had a pantry and fridge full of interesting ingredients, all of which needed combining and cooking to create something to eat. I hated it growing up but value it having been that way now. Not just because it's made me dislike junk but because it helped get me into cooking.
That said, when I got home from work this evening (feeling rather ravenous) and realised it was going to be a couple of hours until supper because Mathew was out, I regretted the lack of quick nibbles available to me.
Cue a quick dip made with store cupboard ingredients. This one was ready to be wolfed down (or savoured, whichever your appetite will allow) within just 10 minutes. Sure its not as fast as a bag of crisps, but it's tastier by miles.
Enough for several snacks or as a dip for a few people:
One can of chickpeas, drained
1 roasted red pepper from a jar - drained
One clove of garlic
A squeeze of lemon juice
Sea salt and black pepper
One tablespoon tahini paste (get it from delis, continental supermarkets or Sainsburys)
Pitta's to serve (I use the wheat free jobbies but the regular are great too)
100mls extra virgin olive oil and more for drizzling
I recommend using the best olive oil you can find because it makes all the difference. I like to use a DOP (the Italian protected status of origin mark) as the flavour I find to be fantastic and well worth the extra couple of £'s. I've tried dozens of extra virgin olive oils and if you want my view, the Sainsburys Taste the Difference Sicilian is exsquisite.
Method:
- Into a food processor place the chickpeas, garlic, tahini, red pepper and olive oil, a generous grind of black pepper and scrunch of sea salt and blitz until quite smooth (or as smooth as you like)
- Decant into a bowl and using the back of a knife poke holes into the houmous to create little pockets, then drizzle with more extra virgin olive oil so it pools in the wells, and give another scrunch of salt and black pepper
- Toast and cut up your pittas and then eat dipped into the tasty coral coloured houmous
Instead, we had a pantry and fridge full of interesting ingredients, all of which needed combining and cooking to create something to eat. I hated it growing up but value it having been that way now. Not just because it's made me dislike junk but because it helped get me into cooking.
That said, when I got home from work this evening (feeling rather ravenous) and realised it was going to be a couple of hours until supper because Mathew was out, I regretted the lack of quick nibbles available to me.
Cue a quick dip made with store cupboard ingredients. This one was ready to be wolfed down (or savoured, whichever your appetite will allow) within just 10 minutes. Sure its not as fast as a bag of crisps, but it's tastier by miles.
Enough for several snacks or as a dip for a few people:
One can of chickpeas, drained
1 roasted red pepper from a jar - drained
One clove of garlic
A squeeze of lemon juice
Sea salt and black pepper
One tablespoon tahini paste (get it from delis, continental supermarkets or Sainsburys)
Pitta's to serve (I use the wheat free jobbies but the regular are great too)
100mls extra virgin olive oil and more for drizzling
I recommend using the best olive oil you can find because it makes all the difference. I like to use a DOP (the Italian protected status of origin mark) as the flavour I find to be fantastic and well worth the extra couple of £'s. I've tried dozens of extra virgin olive oils and if you want my view, the Sainsburys Taste the Difference Sicilian is exsquisite.
Method:
- Into a food processor place the chickpeas, garlic, tahini, red pepper and olive oil, a generous grind of black pepper and scrunch of sea salt and blitz until quite smooth (or as smooth as you like)
- Decant into a bowl and using the back of a knife poke holes into the houmous to create little pockets, then drizzle with more extra virgin olive oil so it pools in the wells, and give another scrunch of salt and black pepper
- Toast and cut up your pittas and then eat dipped into the tasty coral coloured houmous
Subscribe to:
Posts (Atom)